Tired of paying commercial boatyards $400 to $800 every autumn to wrap your boat for the winter? Mastering DIY boat shrink wrapping is one of the most rewarding and cost-effective skills a boat owner can develop. A properly constructed shrink wrap cover forms an impermeable, drum-tight white armor that effortlessly sheds heavy snow loads, blocks 100% of damaging ultraviolet (UV) radiation, and eliminates the pooling water pockets that collapse loose canvas tarps.
While the prospect of operating a high-output propane heat torch near your fiberglass hull can seem intimidating, executing safe DIY boat shrink wrapping comes down to disciplined framing, proper perimeter strap tensioning, continuous torch sweeping, and essential cross-ventilation. Below, veteran boatyard technicians walk you through the complete step-by-step DIY process, tool requirements, and cost savings.
DIY vs. Professional Shrink Wrapping Cost Analysis
Commercial marine service centers charge between $14 and $24 per linear foot for seasonal shrink-wrapping. Investing in your own tools pays for itself on your very first boat wrap:
| Vessel Length | Professional Boatyard Cost | DIY Material Cost (Per Year) | 5-Year Net DIY Savings |
|---|---|---|---|
| 18 – 20ft Bowrider / Skiff | $320 – $440 / yr | $85 – $115 | $1,175 – $1,625 |
| 22 – 25ft Center Console | $420 – $580 / yr | $120 – $160 | $1,500 – $2,100 |
| 26 – 30ft Cabin Cruiser | $550 – $750 / yr | $165 – $220 | $1,925 – $2,650 |
One-Time Equipment Investment: A complete professional marine propane heat gun kit (such as a Dr. Shrink DS-SHRINKFAST 998 or Ripack kit), strap tensioning tool, and safety gear costs approximately $450 to $650. For multi-boat families or boaters planning long-term ownership, the investment yields significant dividends.
Essential Tools & Materials Checklist
- 7-Mil Virgin Polyethylene Shrink Film: Always use 7-mil thickness in white. White reflects sunlight, keeping the cockpit cool and preventing winter temperature swings that cause internal moisture condensation. Never use blue or black film in sunny climates; dark film absorbs solar heat, baking vinyl seats and turning cockpits into humid ovens.
- Propane Heat Shrink Tool: High-output propane torch with an integrated pressure regulator hose.
- 3/4-Inch Woven Polyester Strapping & Metal Buckles: Heavy strapping with a 1,500-lb tensile rating forms the perimeter band and ridgepole roof structure.
- Wooden 2×4 Support Uprights & Carpet Scraps: Vertical support posts topped with carpet or plastic end-caps protect gelcoat and canvas snaps from puncture.
- Louvered Weatherproof Vents: Self-adhesive plastic vents that maintain continuous cross-ventilation.
Step-by-Step DIY Boat Shrink Wrapping Protocol
Step 1: Prep the Interior & Build the Wooden Ridgepole
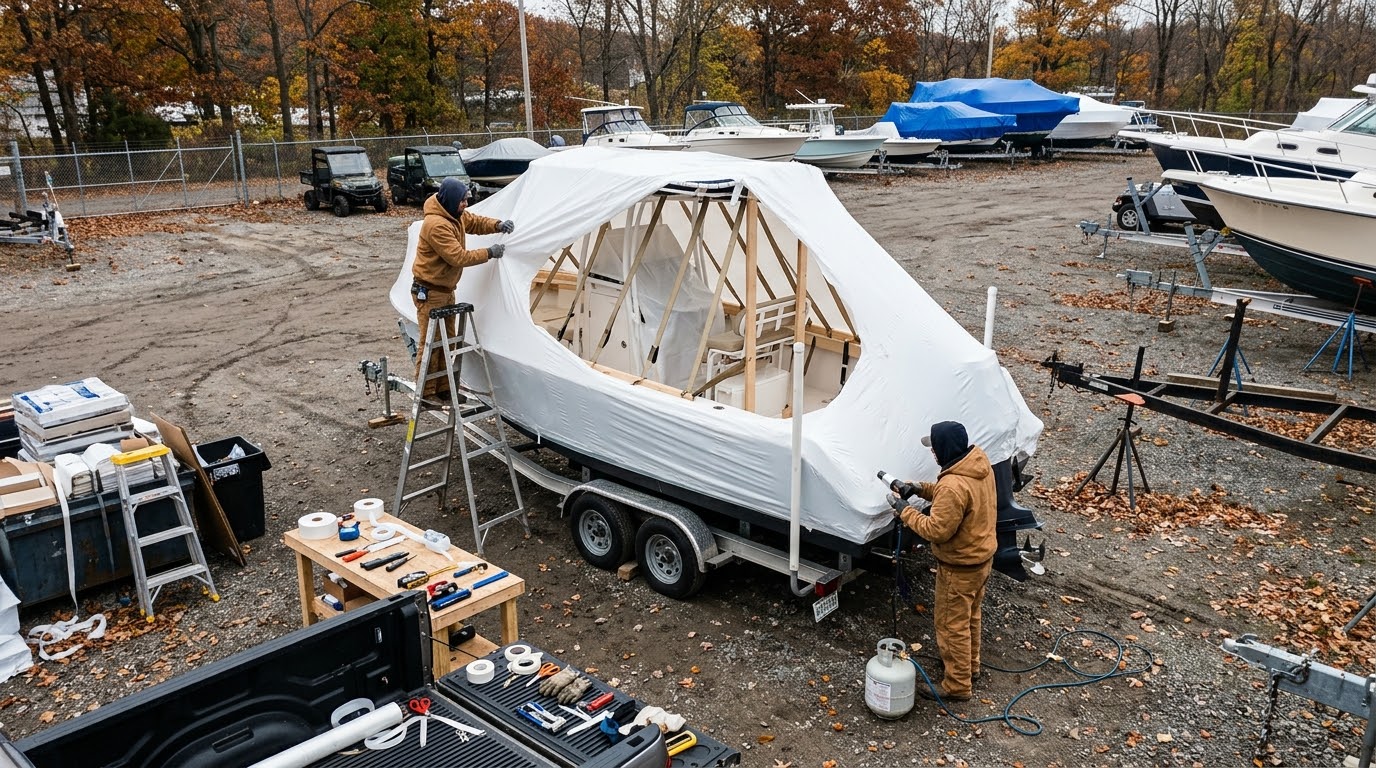
Clean and dry the cockpit thoroughly. Remove cushions, life jackets, and food items. Erect two to three vertical 2×4 support uprights along the centerline of the boat (one bow, one midship, one stern). The ridgepole should angle upward from the bow eye to the center console at a steep pitch (minimum 45-degree angle) so heavy snow slides off easily. Top the uprights with plastic protective caps. Run tight 3/4-inch polyester strapping from bow to stern across the tops of the uprights to form the roofline ridgepole.
Step 2: Install the Perimeter Belly Band
Thread a continuous loop of 3/4-inch strapping around the entire hull approximately 6 to 8 inches below the rub rail. Using a manual strap tensioning tool, pull the perimeter band rock-tight and lock it with a heavy steel wire buckle. Tie supporting belly straps underneath the boat hull to the trailer frame every 6 feet to prevent the perimeter band from riding upward when the plastic shrinks.
Step 3: Drape and Tuck the Shrink Film
Roll the white 7-mil shrink film down the centerline of the boat, unfolding it down both port and starboard sides. Allow roughly 12 to 18 inches of excess film to hang below the perimeter band. Fold the bottom edge of the plastic up and around the perimeter band, and tack it securely in place every 12 inches using marine shrink-wrap heat tape.
Step 4: Heat Shrinking (The Continuous Sweeping Technique)
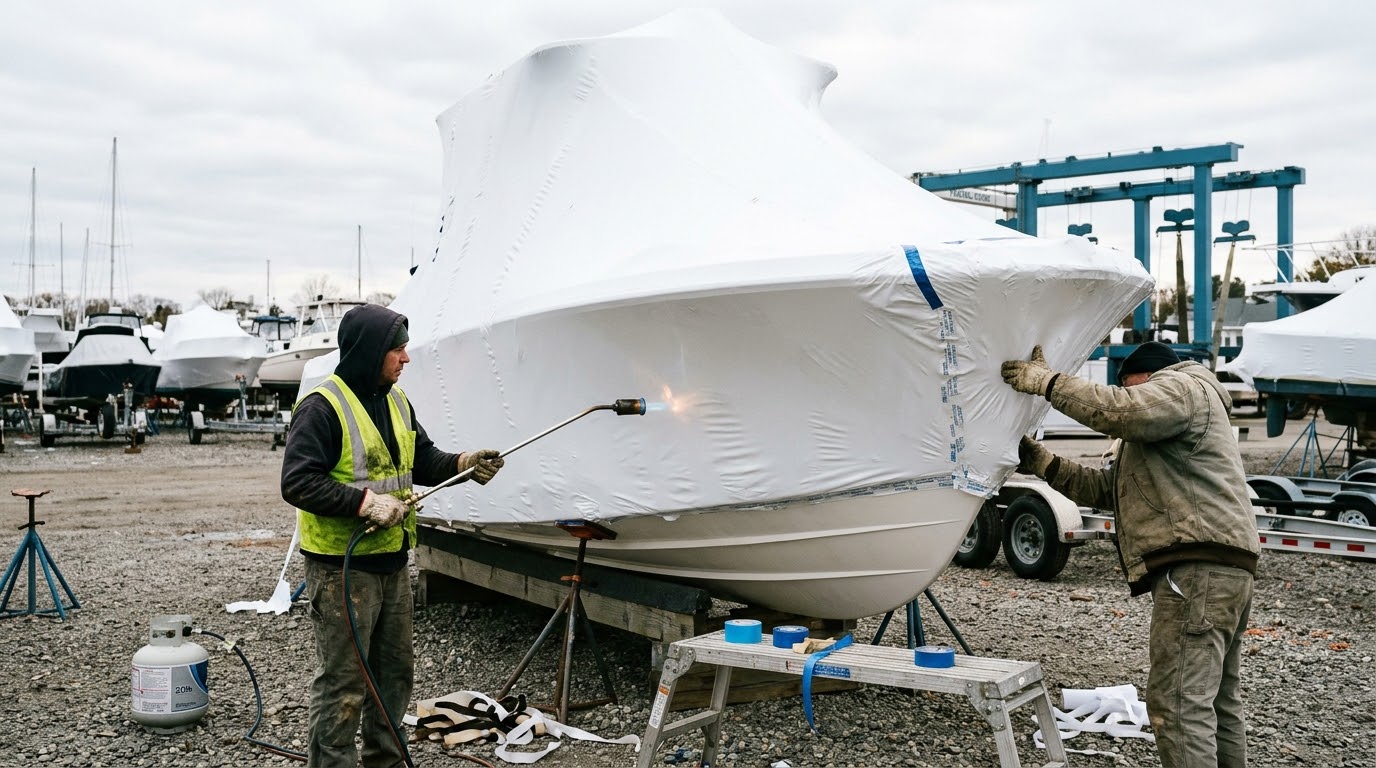
Ignite your propane heat tool. Crucial Safety Rule: Never hold the heat gun stationary on one spot! Always move the torch in a smooth, continuous, sweeping motion like spray painting, keeping the nozzle 12 to 18 inches away from the film. Start at the bottom perimeter seam to weld the plastic to the belly band. Then, move up the sides of the hull toward the centerline ridgepole. As heat touches the 7-mil film, it will immediately tighten into a drum-tight, wrinkle-free shell.
Step 5: Mandatory Cross-Ventilation & Desiccants
According to winter damage surveys published by the BoatUS Foundation, trapped moisture causes more interior boat damage than winter snow. You must cut and install at least four to six louvered weatherproof vents (two near the bow, two midship, two near the stern) to establish continuous cross-ventilation. Hang two moisture-absorbing desiccant bags (such as DampRid) inside the cabin to absorb remaining humidity.
Winterizing Systems Before Shrink-Wrapping
Once your boat is sealed in shrink wrap, accessing the interior is difficult. Complete all mechanical winterizing beforehand:
- Flush and freeze-proof engine blocks following our master boat winterization guide and our inboard engine winterization guide.
- Disconnect and charge batteries using our marine battery care guide.
- Compare outdoor parking costs with our outdoor boat storage cost guide.
Frequently Asked Questions About DIY Boat Shrink Wrapping
Can shrink-wrap plastic catch fire during installation?
Yes. 7-mil polyethylene is flammable if subjected to direct stationary flame. Always keep a working fire extinguisher and a spray water bottle within arm’s reach. If you accidentally burn a hole through the film, blow the flame out immediately, allow it to cool, and patch the opening using genuine 4-inch marine heat tape.
Can I reuse boat shrink-wrap next winter?
Standard shrink-wrap is designed for single-season disposable use because the polymer chains stretch and lock permanently during the heating process. However, if you carefully cut the belly band in the spring without tearing the roof, you can reuse the cover for one additional season by re-taping the perimeter seam.
Is blue shrink wrap better than white shrink wrap?
In snowy northern climates, blue film absorbs solar heat, helping snow melt off the roof slightly faster. However, in sunbelt states or regions with mild winters, blue film causes extreme cockpit heat buildup that ruins electronics, melts adhesives, and triggers aggressive mold growth. White film is the universal industry standard.
Do I need to pad the boat rub rail and windshield corners?
Yes. Sharp aluminum windshield corners, rod holders, VHF antenna bases, and raw fiberglass corners will slice through tight shrink wrap like a knife. Always wrap sharp corners with foam pipe insulation or carpet scraps before draping the plastic.
Published by Boat Maintenance Guide Winter Lay-Up Desk. Inspected in accordance with American Boat and Yacht Council (ABYC) and BoatUS Foundation lay-up safety standards.