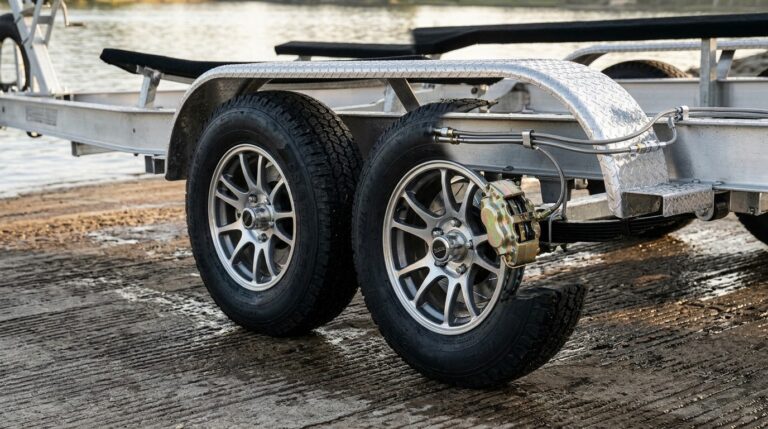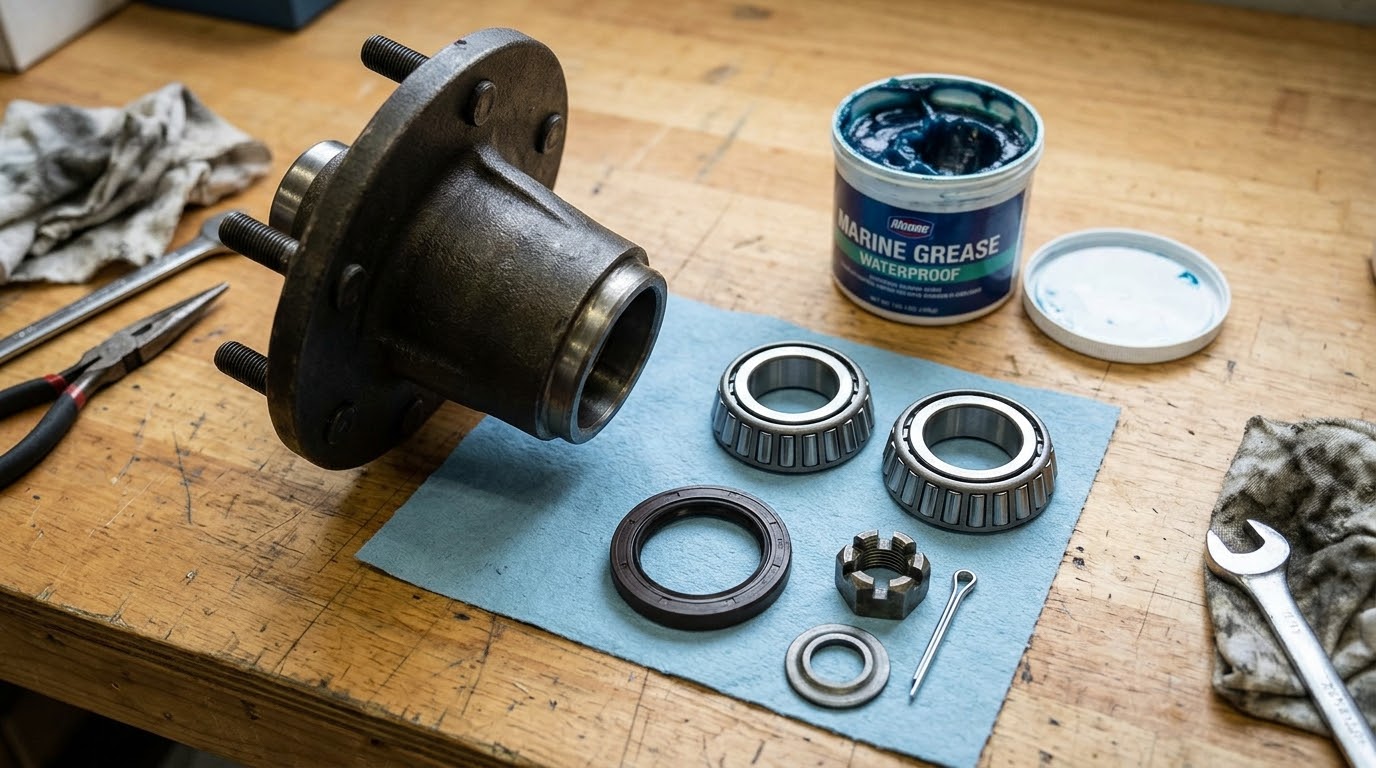
A seized wheel hub on the side of a remote highway is every boater’s worst travel nightmare. Executing timely boat trailer wheel bearing replacement is the single most vital preventative maintenance procedure you can master to protect your trailer axle, tires, and boat hull from catastrophic roadside failure. Unlike car bearings that operate in dry environments, trailer bearings endure extreme thermal shock: highway speeds heat the hub to over 130°F before being instantly plunged into cold lake or sea water at the boat ramp.
This rapid temperature plunge creates an internal vacuum that pulls water past worn seals, transforming grease into a milky sludge that pits bearing rollers. Performing proactive boat trailer wheel bearing replacement every 2 to 3 years ensures your trailer rolls smoothly, quietly, and reliably across thousands of highway miles. Below, master trailer technicians break down the complete step-by-step DIY overhaul.
Recognizing When Wheel Bearings Are Failing
Never wait for a wheel to wobble or smoke on the highway before deciding to tackle boat trailer wheel bearing replacement. Inspect your hubs for these four critical warning indicators:
- The Touch Test: After driving at highway speeds for 30 to 45 minutes, immediately place your bare hand on each trailer wheel hub. A healthy, well-greased hub will feel barely lukewarm. If a hub feels hot to the touch (exceeding 140°F) or radiates burning odor, bearing failure is imminent.
- The Jack & Spin Test: Jack up the trailer axle until the tire clears the ground. Spin the wheel by hand while listening closely. A smooth, silent rotation is normal; a crunchy, gravelly, or rumbling grind indicates spalled bearing rollers and pitted race cups.
- The 12-and-6 O’Clock Rock: Grasp the top and bottom of the elevated tire and rock it firmly back and forth. Any noticeable lateral play or clunking movement indicates excessive bearing end-play or a loose castle nut.
- Milky or Burned Grease: Prying off the dust cap reveals the truth: fresh marine grease is translucent blue, red, or amber. Milky white, foamy grey, or gritty black grease means water intrusion has destroyed the lubricant’s film strength.
Required Tools & Parts Checklist
| Tool / Replacement Part | Recommended Specification | Purpose in Replacement Process |
|---|---|---|
| Bearing & Race Kit (Inner & Outer) | Matched Timken or Dexter kit (e.g., L68149 / L44649) | Replaces worn rollers and outer bearing races inside the hub |
| Double-Lip Spring-Loaded Marine Seal | Stainless steel garter spring with nitrile rubber seal | Prevents water ingress from entering the rear spindle bore |
| Marine Waterproof Wheel Bearing Grease | Aluminum Complex or Calcium Sulfonate base (NLGI #2) | High-temp, saltwater corrosion-resistant lubrication |
| Brass Drift Punch & Ball-Peen Hammer | 1/2-inch brass drift punch | Drives old hardened races out of hub without gouging steel walls |
| Stainless Steel Cotter Pins | Grade 316 stainless steel (1/8 in x 1.5 in) | Locks the castle nut securely onto the threaded axle spindle |
Step-by-Step Boat Trailer Wheel Bearing Replacement Guide
Step 1: Wheel Removal & Hub Disassembly
Chock the opposite trailer tire. Loosen the lug nuts slightly while the tire rests on the pavement, then jack up the axle frame securely with a rated hydraulic floor jack and support with jack stands. Remove the lug nuts and wheel. Use a rubber mallet and flathead screwdriver to gently pry off the dust cap or Bearing Buddy. Straighten and extract the rusted cotter pin, unthread the castellated nut, and slide off the spindle thrust washer. Pull the hub straight toward you; the smaller outer bearing will slide into your hand.
Step 2: Driving Out the Old Bearing Races
Wipe the contaminated grease from inside the cast-iron hub bore. To perform complete boat trailer wheel bearing replacement, you must replace the tapered steel outer race cups pressed into the hub—never install new bearing cones onto old, scarred races! Flip the hub upside down on wooden blocks. Inside the hub cavity, locate the two small relief notches behind the bearing race. Position your brass drift punch against the lip of the race and tap firmly with a hammer, alternating sides (12 o’clock, 6 o’clock) until the old race drops out. Repeat for the opposite inner race.
Step 3: Seating the New Bearing Races
Clean the inner hub cavity thoroughly with brake cleaner and inspect for metal burrs. Coat the inner hub walls with a light film of fresh marine grease. Take the new inner race, place it squarely into the hub bore with the tapered cone facing outward, and use a dedicated bearing race installation driver tool (or carefully tap around the perimeter with your brass punch) until you hear a sharp, solid metallic “thud”, indicating the race is 100% fully seated against the internal stop shoulder.
Step 4: Packing the Bearings with Marine Grease
Never rely on a grease gun to fill dry bearings! You must manually pack the rollers before assembly. Place a generous scoop of marine-grade aluminum complex grease in the palm of your gloved hand. Force the wide edge of the tapered roller bearing against the grease repeatedly with a scraping motion until grease forces its way completely up through the small rollers and oozes out the top face. Rotate the bearing and repeat until every roller pocket is fully packed.
Step 5: Installing the Double-Lip Seal & Setting Preload
Drop the packed inner bearing into the rear of the hub. Place the new double-lip marine seal over the bearing. Using a flat wood block, tap the seal gently and evenly until it sits completely flush with the hub casting edge. Slide the assembled hub onto the greased spindle. Insert the packed outer bearing, washer, and castle nut.
Setting Proper Spindle Preload: Tighten the castle nut with a wrench to approximately 20 ft-lbs while spinning the hub forward and backward by hand to seat all bearing rollers flat. Then, back the castle nut off 1/6th of a turn (one flat) until the cotter pin hole aligns with a castle slot. The hub should spin effortlessly with zero dragging resistance and virtually imperceptible end-play (0.001 to 0.005 inches). Slide in a fresh stainless steel cotter pin and bend the legs tightly around the nut.
Final Hub Pressurization & Maintenance
After completing your boat trailer wheel bearing replacement, tap your spring-loaded Bearing Buddies back onto the hub nose. Using a manual grease gun, slowly pump high-performance marine grease until the internal piston moves outward roughly 1/8 inch. Always inspect according to safety protocols established by the National Association of Trailer Manufacturers (NATM).
For seasonal maintenance schedules, consult our comprehensive boat trailer maintenance checklist, and check our master boat storage cost guide for off-season trailer parking options.
Frequently Asked Questions About Boat Trailer Wheel Bearing Replacement
How often should boat trailer wheel bearings be replaced?
In freshwater boating, boat trailer wheel bearings should be disassembled, inspected, and repacked annually, and replaced every 3 to 5 years. In saltwater trailering, bearings and seals should be inspected every 6 months and completely replaced every 2 years due to high corrosion risks.
Can I mix different brands or types of wheel bearing grease?
Never mix greases with different thickener bases (such as mixing aluminum-complex with lithium-complex grease). Incompatible chemical thickeners react and separate into thin oil and solid chalky residue, destroying lubrication and causing bearings to seize within 50 miles.
Why did my new trailer wheel bearing fail after only two trips?
Early bearing failure is almost universally caused by either overtightening the castle nut (over-preloading the rollers without leaving end-play for thermal expansion) or improper rear seal installation that allowed water intrusion on the very first boat launch.
Do I need to replace the trailer axle spindle if the bearing spins on it?
If a seized bearing has spun on the spindle shaft, creating deep grooves or turning the steel blue from friction heat, the axle spindle is structurally ruined. Installing new bearings on a damaged, undersized spindle will cause rapid wobble and catastrophic failure at highway speeds; the spindle or entire axle beam must be replaced.
Published by Boat Maintenance Guide Certified Marine Mechanics Desk. Inspected in accordance with National Association of Trailer Manufacturers (NATM) safety guidelines and ABYC H-2 trailer standards.